Wednesday, November 30, 2005

FYI - Change Your Internet Settings With a Click of a Button


If you're like me you have a laptop which you use at home and at work. It can be extremely annoying when you switch between the two and you have to setup a proxy, map network drives, setup shared files, or the vpn each time to connect at the office and then reset it to access the internet at home.
I found Net Profiles to be very easy and effective in dealing with this problem, you simply setup different profiles, i.e. home, office, school, etc. and select whichever you want to use and BAM! everything is ready to go.
If you need any help with this program let me know!

I'm back!

It's been close to 3 mos since my last post...I'm glad to say that I will again continue to post new How-to tutorials in the coming weeks. Enjoy!

Friday, September 02, 2005

Guide – How to Create a New Email Message without Opening Outlook


This step-by-step visual guide will show you how to create a shortcut that will be placed on your desktop so that you don’t have to open Outlook in order to send an email, you simply click the shortcut and the new message window will open. I used Outlook 2003 to create this tutorial. If you have any questions or comments let me know.

Click here to download PDF file!

You need Adobe Acrobat Reader 5 or above to view the file above.

Wednesday, August 31, 2005

Guide - How to Create Keyboard Shortcuts to Your Favorite Programs

This step-by-step visual guide will show you how to create keyboard shortcuts to your favorite applications and documents. In this example I will make a shortcut to my favorite video game Battlefield 2. If you have any questions or comments please let me know.

Click here to download PDF file!

You need Adobe Acrobat Reader 5 or above to view the file above.

Thursday, August 25, 2005

FYI - Internet Explorer 7 Screenshots

I found this link on Digg.com that referred to Internet Explorer 7. I downloaded the file and installed it. The experience wasn't too great, the computer rebooted fine, but when I ran IE7 for the first time, it failed from the get go, I closed it and tried it again...failed! I checked the specs on the machine, made sure all the updates were done - everything was up to date, so I restarted the machine, tried loading IE7 again and it failed. I included some sreenies of the failure.
I open Internet Explorer 7 and I'm greeted with this!

The version number is 7.0.5112.0 - Error report

For those of you who installed the software and are now regretting it, follow these steps (thanks Juke) to remove IE7 from your system, I'll just wait until the public Beta is released!

Wednesday, August 24, 2005

FYI - Use the Windows Vista Theme on your Windows XP Machine


I found this awesome theme on digg.com, I have installed it on my machine and it works great. The advantage of this theme pack is that it does not require a third-party program, it modifies adds to the existing set of themes on your machine. The theme is absolutely gorgeous, you don't sacrifice any resources because it's just like having another built-inWindows XP theme selected. If you chose to install the Y'z Shadow, and the other adds those do take up resources, but no more than 25 MB of RAM.
Download it - http://en.crystalxp.net/bricopack.php

Only little problem I've experienced, sometimes the icons on the bar get stuck, all you have to do is hover above the icon and it'll go away.

Icons added to taskbar

Resources used...

FYI - Want to Talk Long Distance Without the Fees – Read On!


Google has just released Google Talk chat client. The software allows you to chat as you would on AIM or MSN messenger, but it also allows you to carry a voice conversation with whomever you’re chatting to. I’ve tried it out and the voice quality is excellent. If you wish to download the client go to http://google.com/talk after you’ve installed the client you need to have a GMail account to use it, if you don’t, I have a couple of invitations left, just email me and I’ll take care of you. Enjoy!

Tuesday, August 23, 2005

Guide - How to Add Word Count Counter on your Toolbar


This step-by-step visual guide will show you how to enable the Word Count counter on your toolbar. This feature is very useful when you’re assigned a paper with 1,000 words and you need 100 more to finish. With this feature enabled you’ll avoid having to go to ‘Tools > Word Count’ instead you just click recount on the toolbar and it updates the number of words in your document. If you have any questions/comments let me know.

Click here to download PDF file!

You need Adobe Acrobat Reader 5 or above to view the file above.


Guide - How to Get Rid of the Sometimes Annoying Clipboard in Microsoft Office

This step-by-step visual guide will show you how to disable the Clipboard in Microsoft Office from automatically popping up whenever you copy more than two items. Sometimes this feature can be really annoying when you’re working in Access or Excel, when screen space is very precious. If you’re like me and you hardly use this feature, read on. If you have any questions/comments let me know.

Click here to download PDF file!

You need Adobe Acrobat Reader 5 or above to view the file above.

Sunday, August 21, 2005

Guide - How to Add A 'Copy To' and 'Move To' Command to Your Windows XP Context Menu

This step-by-step visual guide will show you how to add the ‘Move To’ and ‘Copy To’ command to your context menu. With these two options you won’t have to copy and paste from one directory to the other, you can simply right click on the file you wish to copy/move select either option resulting in a dialog box that will prompt you for the destination of the file you’re moving/copying.

This little timesaver requires the user to modify the registry, however in this tutorial we are not going to directly go into the registry and modify it (there’s too much room for error, and an error in the registry could spell disaster) so instead I have created two registry entries that contain the necessary information to input those values and give you two commands with little effort. Before we modify the registry, we will first make a backup of your registry in case you wish to revert to your current state. Let me know if you have any comments or suggestions for this guide.

You will need this file to complete this tutorial.

Click here to download PDF file!

You need Adobe Acrobat Reader 5 or above to view the file above.

Friday, August 19, 2005

Guide: How to Change Your Windows XP Logon Screen


This step-by-step visual guide will show you how to change your Windows XP logon screen to anything you like. There are several programs out there that will allow you to change your logon screen, but for a cost. In this guide I’m going to show you how to do it yourself for free!

There are several places that offer free logon screens for downloads, you can browse through Google or simply use one my favorites, DeviantArt. In this How-to I’m going to be using WinRAR to extract (you can use the windows built extraction or any other compression program you may have installed) the files that I downloaded and I will be using the FBI Logon screen from pruizgarcia as a sample. If you have anything to add to this please comment on this post and let me know.

Click here to download PDF file!

You need Adobe Acrobat Reader 5 or above to view the file above.

Tuesday, August 16, 2005

Guide: How to Disable the ‘Automatic Search for Network Folders and Printers’ in Windows XP

This step-by-step visual guide will show you how to disable the sometimes annoying Windows XP feature that automatically adds network folders & printers which you may already have installed on your system. Doing this will prevent the computer from having printers that are no longer on the network to stop appearing as well as preventing the same printer listed twice.

This feature is enabled by default. Your computer will periodically scan other computers on the network and automatically lists their shared resources on your computer. The problem arises when you already have that resource setup manually and it lists that resource again. This can lead to confusion, so if you wish to avoid that confusion, follow the directions on the PDF below. If you have anything to add to this please comment on this post and let me know.

Click here to download PDF file!

You need Adobe Acrobat Reader 5 or above to view the file above.

Tuesday, August 02, 2005

FYI: GMail Drive Serves Up 2GB of Free Online Storage

As you all know Google Offers GMail with 2GB of email storage, will you ever fill that up? Probably not! Now comes Bjarke who writes a nifty little shell program that allows you to set up a virtual drive on your computer with direct access to your GMail account, all of a sudden, you’ve got 2GB of online storage for free!
The program does have some limitations, file name must remain under 40 characters & files are limited to 10 megabytes.
Get GMail Drive 1.06
Some Screenshots
GMail Drive Login Screen

'Send To' shell shortcut

Transferring files over to GMail

The Files I sent through GMail Drive in my GMail folder

'My Computer' with the GMail Drive installed

Guide: Get Rid of MSN Messenger

Ever tried disabling MSN Messenger only to find it won’t go away? There’s a very simple solution to this problem, do this and Messenger will never bug you again.
..
1. Click on ‘Run…’ from the ‘Start’ menu
..

2. Type (or copy and paste) the following
RunDll32 advpack.dll,LaunchINFSection%windir%\inf\msmsgs.inf,BLC.Remove
Into the box and hit ‘Enter’

3. Restart your computer and you shall never see MSN Messenger again!

Monday, August 01, 2005

Preview: Microsoft OneCare Live Beta 1

So far the software seems very promising, backups/restores are easy, the integration with the Windows XP OS is seamless. You have antivirus, firewall, backup, defragmenter, file cleanup...all in one package. Symantec & McAfee watch out!

Some screenshots of Microsoft OneCare Live...


OneCare Live Main Page

OneCare Live Backup Wizard

OneCare Live Restore Wizard

OneCare Live Splash Screen

Sunday, July 31, 2005

FYI: Make Your Own PDF Files For Free

Once installed PrimoPDF allows you to create PDF files from virtually any program that has the print feature. The program installs a PDF printer on your machine which allows you to print Word documents, Excel spreadsheets, websites, and anything you could possibly print to a PDF file. The program is very simple and straightforward, you have several options for output; print, e-book, web, etc, you even get the option to password protect your file to restrict viewing. I own a copy of Acrobat Pro and I have compared the PDF’s created with both Acrobat & Primo and I can’t tell the difference, so try it out! http://www.primopdf.com/

Guide: List the Contents of Any Folder Without Typing

Ever wanted to list your songs in a Word document, but didn't want to sit there and type 100 song titles? Well, read along there is actually a very simple way of listing the contents of any folder without typing a single word.
...
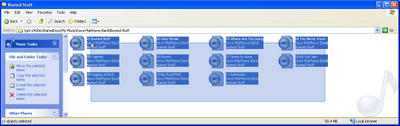
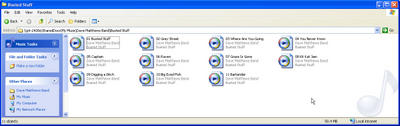
1. Open the folder whose contents you wish to list.


2. Select the files you want listed. In this example I’m using music files for a Dave Matthews Band CD.

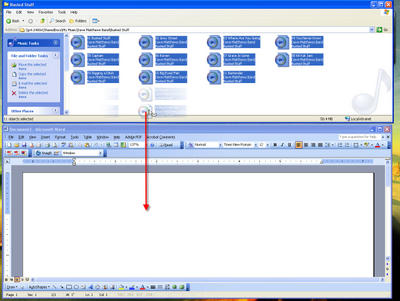
3. Once you have Microsoft Word open right-click and hold to drag the files to Word.

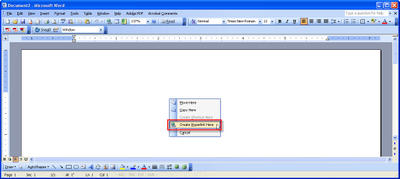
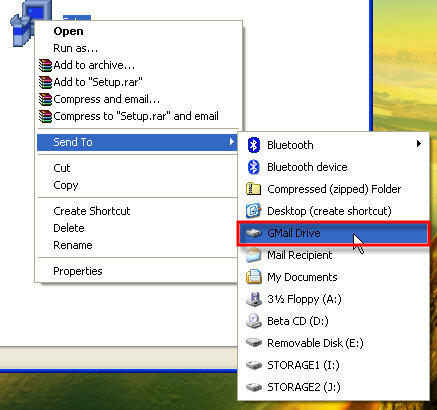
4. Select ‘Create Hyperlink Here’ on the menu that appears.

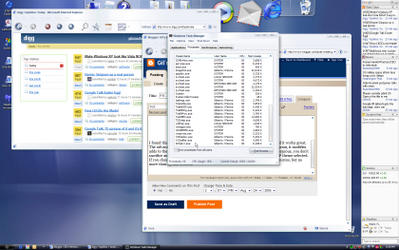
5. Your document should look something like this.

6. Select everything and right-click ‘Cut’

7. Under ‘Edit’ select ‘Paste Special’

8. Select ‘Unformatted Text’ from the ‘Paste Special’ Menu and click ‘OK’

9. Your document should look like this.

10. Highlight the pathname of any file and right-click ‘Copy’

11. Select everything, under ‘Edit’ click on ‘Replace…’

12. Input the directory you copied from Step #10 into the ‘Find what’ input then type in ‘^p’ in the ‘Replace with’ input box. When complete click on ‘Replace All’

13. Click ‘OK’

14. Click ‘Close’

15. You’re done! You should now have a listing of all the files you selected in Word.
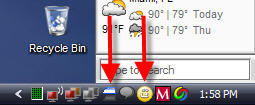
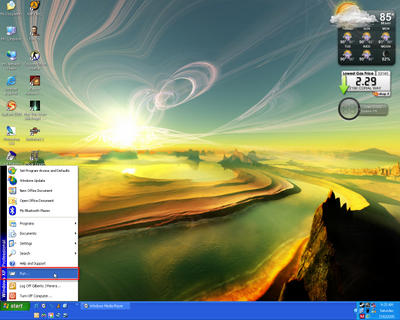
Saturday, July 30, 2005

Guide: Securing Your Wireless Network Part I

In this step by step guide I will show you how to increase your wireless networks security. This guide was created using a Linksys WAP54G Wireless Access Point. I will cover other routers and access points as soon as I get my hands on them. For the time being you will learn the following:
.
Change your SSID: The reason we are going to change the SSID (which is your wireless routers/access point’s identifier) on your wireless router/access point is to avoid intruders from knowing your router name, this will be relevant in future guides when I’ll demonstrate how to disable broadcasting and make your wireless router/access point virtually invisible.
Enable MAC filtering: This feature will only allow certain computers (specified by you) to use your wireless router/access point. This guide will show you how to obtain your MAC address. http://gilsmethod.blogspot.com/2005/07/guide-how-to-obtain-your-mac-address.html
Change default password: Your wireless routers/access points default password is ‘admin’, everyone who owns a wireless router knows that, you might want to change it to something only you know.

1. Go to ‘Start’ and click on ‘Run…’

2. When the ‘Run’ prompt appears type the Wireless Access Points address ‘http://192.168.1.245’ and click ‘OK’

3. Leave the User Name ‘blank’ and type the Wireless Access Points Default Password ‘admin’ then click ‘OK’

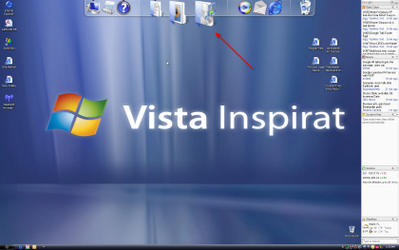
4. This is the Wireless Access Points main Setup page

5. Change your SSID from the default ‘linksys’ to something easy to remember, this will become relevant in future tutorials. Click ‘Apply’ when you’re done.

6. Click on the ‘Advanced’ Tab to open more options

7. On ‘Filtered MAC Address’ select ‘Enable’ from the drop down menu. Enter the MAC address for all the wireless adapters you have and click ‘Apply’. To get the MAC addresses for your machine(s) follow this short guide - http://gilsmethod.blogspot.com/2005/07/guide-how-to-obtain-your-mac-address.html

8. Click ‘Continue’ to return to the ‘Setup’ page

9. To change the default password, click on the ‘Password’ tab

10. Once there type the desired password, and click ‘Apply’. Be sure to remember this password, otherwise you will have to reset the access point to factory defaults.

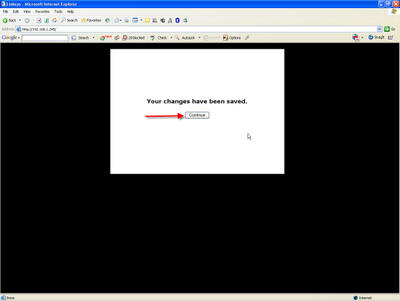
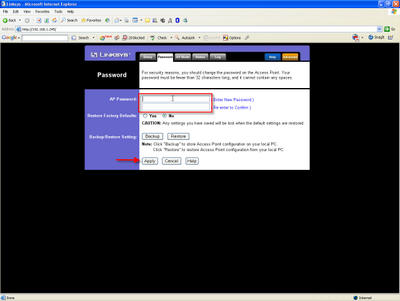
11. Click ‘Continue’ and close the window, you’re done!